FE - FLA - FI
Bem vindos! Blog de Variedades e achados na net que, certamente, estarão com os devidos créditos.
Espero que, assim como eu, gostem de inventar moda com os artigos de sempre e de redescobrirem utilidades para objetos que estavam em desuso. Reciclar, organizar e ter como hobby atividades artesanais, pinturas, croches etc.....
sábado, 31 de março de 2012
quinta-feira, 29 de março de 2012
tapete
Braided Rag Rug


1 honey bun of your choice (featured is "sweet" by urban chiks) and
4 yards of white fabric


 cut your 4 yards of white fabric to 1 1/2 inch widths (yup ALL of it)
 safety pin your three sewn strips anywhere you can be comfy (you are going to be there for a while! i did mineattached to my runner on my dining room table) this is the start of your braid.
 start braiding your white fabric
****EDITED****
****you need to make sure your braiding is SUPER LOOSE. do not make your braids tight at all. if they are tight they will make your rag rug curl up when you try to sew it together.******
 once you get close to the end of your braid you are going to fold over the end of your strip and snip with your scissorsa slit.
 like so, and then you will do the same to the next strip that will be the following strip to lengthen your braid (do this to each of the three strips)
 you will take the next strip and place it on top of the braided strip
 this will adjoin your strips and you will be able to continue your braid
 this is what it should look like, now keep braiding.
 once you get close to the end of your braid you are going to do the same as you did before and make a slit at the ends of your braided strips and at the beginning of your next strips this time wanted to add color so i took one strip of the honey bun and two of the white strips i cut out.
 it should now look like this. this will be what you do through out the whole process of braiding your rug. one color in the middle and two whites on the outside.
 as you continue to braid your braid will get too long so unhook your safety pin and re-pin it closer to your end.
 once you have completely braided ALL your strips together. you are going to sew you braid "shut" this tail will be tucked at the very end and you wont see it.
 now that you have a whole mess of a braid going on...we are off to hand sew it together.
 get some sturdy thread (i recommend one you use for upholstery) and a needle and you are going to start off by coiling your start of the long braid (the whites)
start by hand stitching your coil center like so. (start in the very center of your coil first and work your way out)
*****EDITED*****
make sure once you get your center started and going...place your coil on a flat surface. this will ensure that your rug lays flat with each coil.
also make sure you do not overlay the braids at all. they need to be laying flat and to be sewn side by side to each other.
*****EDITED*****
make sure once you get your center started and going...place your coil on a flat surface. this will ensure that your rug lays flat with each coil.
also make sure you do not overlay the braids at all. they need to be laying flat and to be sewn side by side to each other.
 you are going to continue to hand stitch your braids together, do this for the whole rug. what you are sewing is your back, when you are done, the stitches should be fairly hidden from the top. (the other side)
 when you get to your end, make sure you tuck and stitch the end of your braid so that the tail is on the bottom of your rug and hidden when you turn it over. (snip the extra part of your tail if you like)
****to make your rug a little sturdier, i recommend adding a felt backing to your rug.
first start off with placing your rug on top of your large piece of felt, (you can buy it at walmart for pretty cheap off the bolt you will need aprox 1 1/2 yards (just in case so you can piece a little if needed)) and cutting out the same size as your finished rug.
next hand sew around your rug on top of the felt.
and then at random places adhere your rug in the middle (and all over) by doing big stitches through your coils.
 look what you made! isn't it pretty? and it will look so great ANYWHERE! (make some smaller circles to make bar stool seat covers!)
1 rag rug with width of 32 inches
if you'd like to purchase a kit to make this rag rug please visit this site
*****
to clean your rag rug properly we advise you to wash your rug and lay flat to air dry
******
instructions by vanessa from V and Co.
quarta-feira, 28 de março de 2012
quinta-feira, 22 de março de 2012
quarta-feira, 14 de março de 2012
MEU TENIS

 O zip Shoes parece um all star, mas com uma diferença: um zíper que une o solado com a parte de tecido do calçado. Por causa desse zíper, basta você comprar um solado e ir trocando a parte de cima, conforme a sua vontade. Além das cores básicas, ainda tem várias estampas, uma mais legal que a outra! Os modelos também são variados: tem cano longo e curto, com cadarço, com velcro…Achei a idéia ótima para usar em viagens: em vez de levar vários tênis, dá para levar somente as partes de cima, economizando espaço na mala!
sábado, 10 de março de 2012
terça-feira, 6 de março de 2012
segunda-feira, 5 de março de 2012
Receitas para Festa de Purim - Oznê Haman
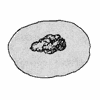
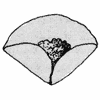
| Ingredientes da massa1 xícara de açúcar 1/3 xícara de óleo 1/3 xícara de margarina ou gordura vegetal 3 ovos 1/2 xícara de suco de laranja 10 xícaras de farinha de trigo peneirada 3 colheres (chá) de fermento em pó 1 ovo para pincelar açúcar de confeiteiro Ingredientes do recheio 50 g de sementes de papoula100 g de açúcar3 colheres (sopa) de vinho doce1/2 colher (sopa) de gordura vegetal1 casca de limão ralada fina100 g de tâmaras picadas Preparo da massa Misture bem o açúcar, o óleo e a gordura vegetal até formar um creme. Adicione os ovos e o suco e mexa bem. Junte os ingredientes secos e enrole no formato de bola. Preparo do recheio Numa panela misture a papoula, o açúcar, o vinho e a gordura. Cozinhe em fogo baixo por alguns minutos mexendo com uma colher de pau. Retire do fogo e acrescente a casca de limão ralada. Observação: se for necessário aumentar a quantidade do recheio, acrescente 1/2 xícara de biscoito esfarelado ou farinha de rosca. Outras opções de recheio Utilizando-se de recheios mais sólidos como Marrom Glacê, goiabada, etc., você consegue fechar a massa com mais facilidade e não corre o risco de abrir-se no momento de assar. Passo-a-passo
Substitua a quantidade de açúcar por adoçante. Para recheio Triture ameixas secas no processador. Se quiser, acrescente castanha de caju picada. Molde com as mãos em pequenas bolinhas. Depois de assado, não polvilhe com açúcar de confeiteiro.
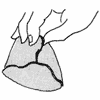
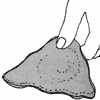
1 3/4 xícara de farinha de trigo2 ovos1/2 colher (chá) de sal3 colheres (sopa) de óleo Ingredientes do recheio 1 xícara de carne moída (ou frango)1 cebola pequena ralada1 colher (chá) de sal Preparo da massa Misture os ingredientes numa vasilha grande. Trabalhe a massa com as mãos e em seguida abra-a sobre uma superfície polvilhada com farinha de trigo. Corte a massa em círculos ou quadrados de uns 8 centímetros. Preparo do recheio Numa travessa menor, misture bem os ingredientes do recheio. Siga as ilustrações de como rechear e dobrar a massa. Observação: os creplach podem ser cozidos em água salgada fervente durante 20 minutos até flutuar ou diretamente na sopa. Podem também ser primeiramente douradas em frigideira tefal (sem óleo) em ambos os lados e depois fervidas na sopa durante 10 minutos. Dica: a massa se desenrolará mais facilmente se ficar embrulhada num pano úmido durante uma hora. Passo-a-passo
| |||||||||||||||||||||||||||||||
Assinar:
Postagens (Atom)


